Pod Billing
We created an app that allowed white-labelled users to generate invoices for their customers based in our mobile usage data.
The app was designed to simplify the billing process and make it easier for users to keep track of their finances. To ensure that the app provided an optimal user experience (UX), it was important to follow a well-defined UX design process.
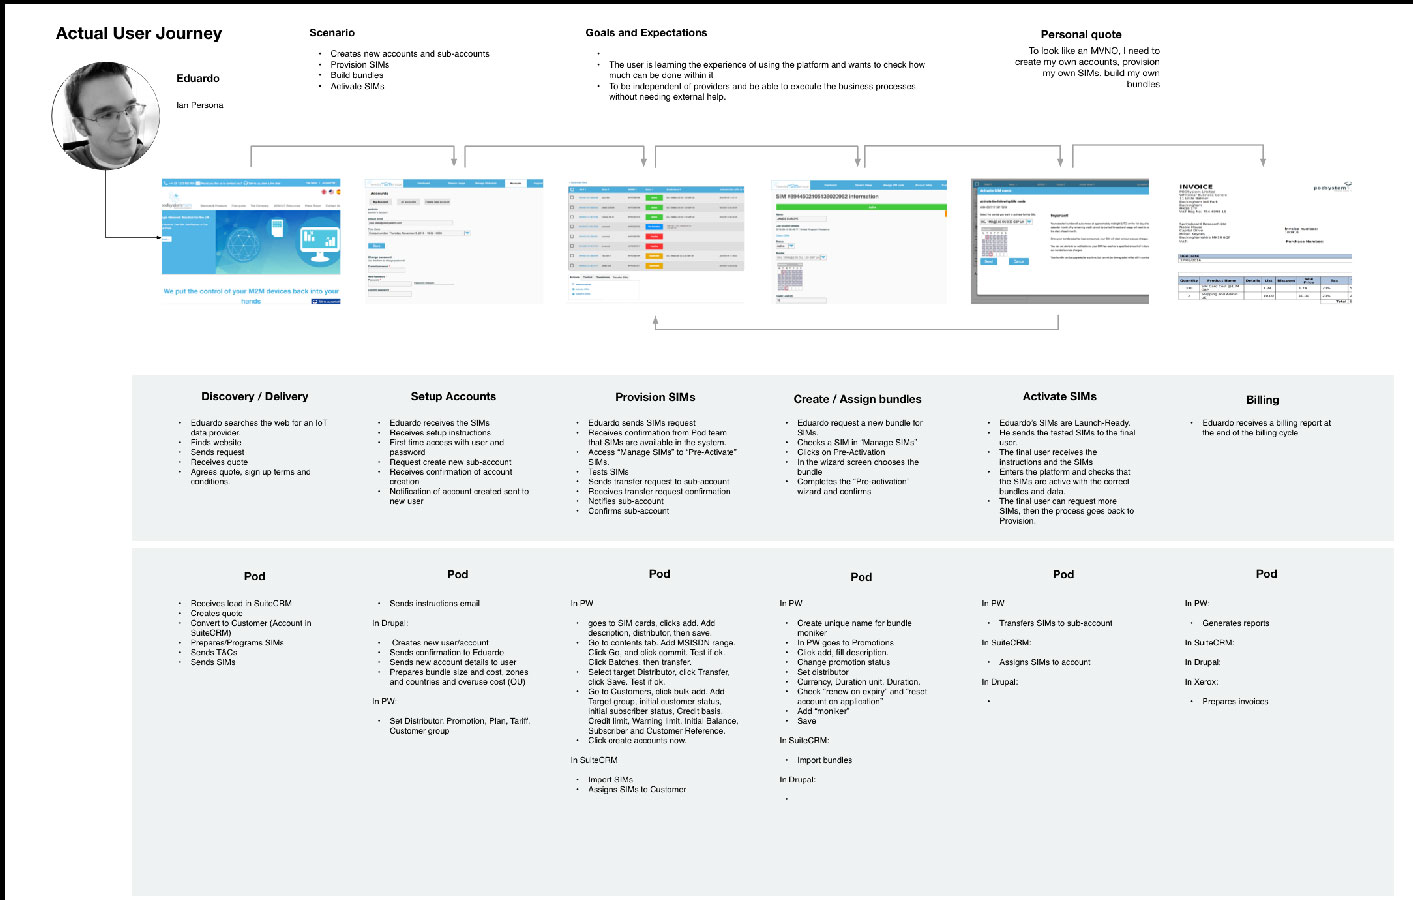
1. Research and Define User Needs
The first step in the UX design process was to research and define the needs of the target users. In this case, the target users were small business owners and freelancers who needed to generate invoices for their customers. To understand their needs, the design team conducted user interviews, surveys, and focus groups. The team asked questions such as:
- What are the biggest pain points when it comes to invoicing customers?
- What features would be most helpful in an invoicing app?
- What devices and platforms do they use to access the app?
Based on the research, the design team created user personas that represented the typical users of the app. These personas guided the design process and helped the team make decisions that aligned with user needs.
2. Define the App’s Functionality
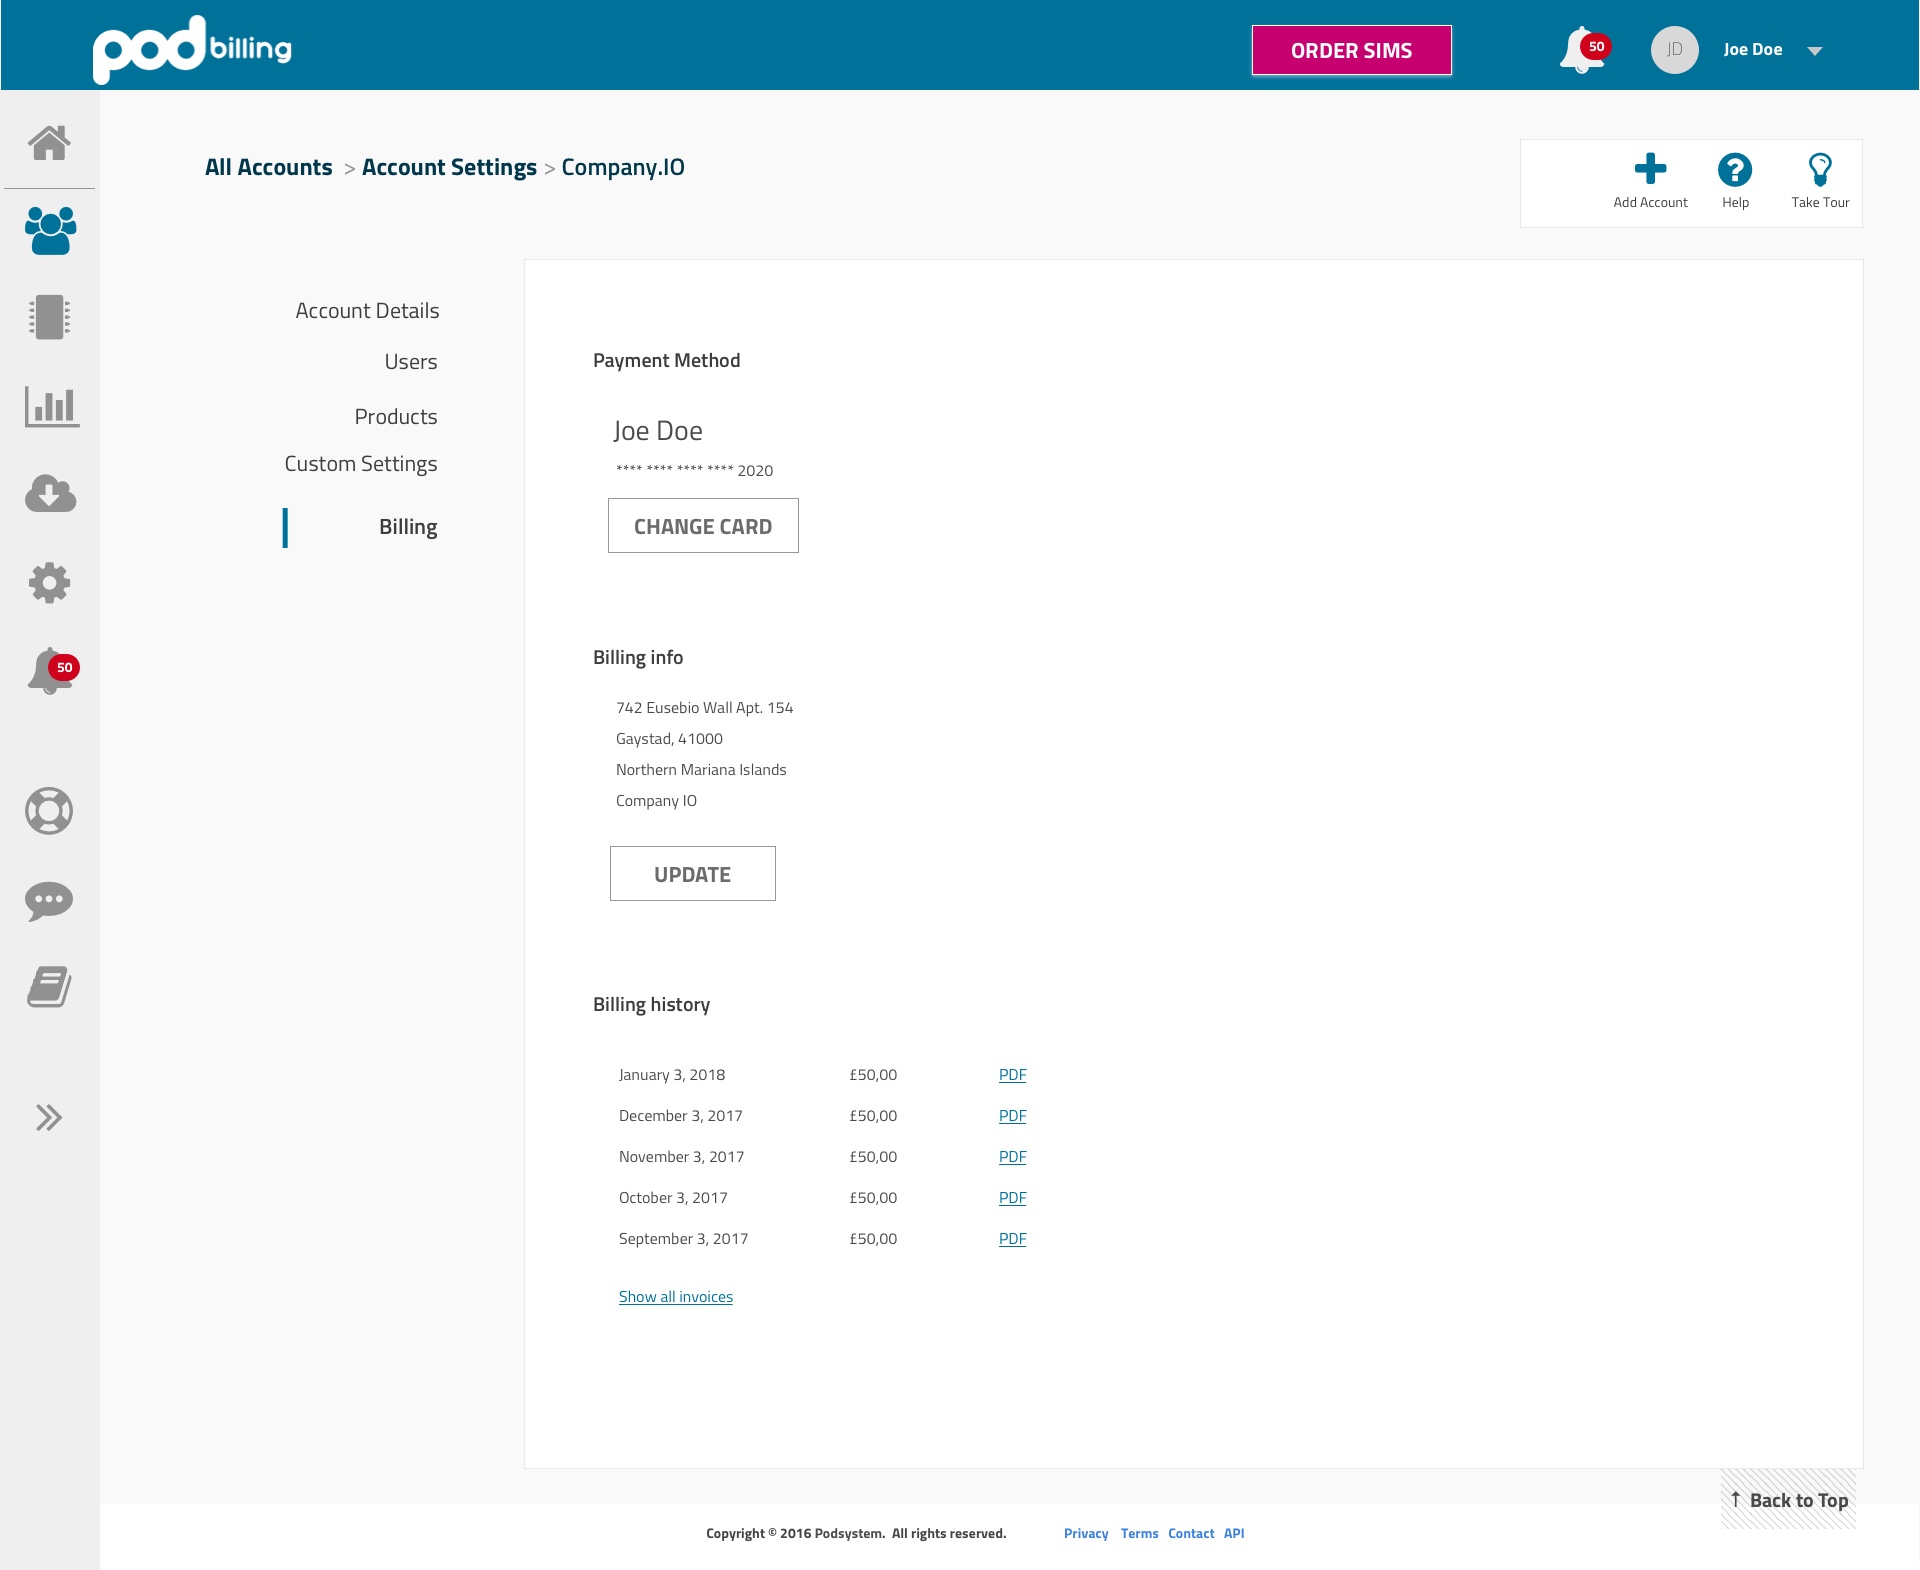
Once the user needs were understood, the design team defined the functionality of the app. In this case, the app needed to allow users to create invoices using data from a mobile virtual network operator and usage data from their IoT SIMs. The app also provided a simple and intuitive interface that allowed users to easily input and manage invoice data.
The team created user flow diagrams to visualize the app’s functionality and ensure that it met user needs. User flows helped identify potential pain points and ensured that the app’s features were logically organized.
3. Create Wireframes and Mockups
With the app’s functionality defined, the design team created wireframes and mockups that illustrated the app’s interface. Wireframes were simple, low-fidelity sketches that showed the layout and structure of the app’s interface. They helped the team test and iterate on different interface ideas quickly.
Mockups were higher-fidelity representations of the app’s interface. They showed the visual design and more detailed interactions between different elements. Mockups helped the team get a better sense of how the app would look and feel.
4. Test and Iterate
With the wireframes and mockups created, the design team began testing and iterating on the app’s interface. The team conducted usability testing to identify any usability issues and made necessary changes to improve the user experience.
The team also used prototyping tools to create interactive prototypes that simulated the app’s functionality. Prototypes allowed users to test the app’s features and provide feedback on its usability.
5. Develop
Once the app’s design had been refined and tested, it was ready for development. The development team used the wireframes, mockups, and prototypes as a guide to create the app’s interface and functionality.
Track, measure, market
After development, the app was launched and made available to users. The launch process included a marketing campaign to promote the app and generate interest among the target audience.
In conclusion, designing an app for generating invoices required a well-defined UX design process that started with research and ended with launch and measuring. The app was designed to meet the needs of its target users, with a simple and intuitive interface that allowed users to easily input and manage invoice data. By following a UX design process, the app provided an optimal user experience and helped the customers to streamline their billing process.

See Also
< Back to Home